If you’re a coffee lover with a sweet tooth, you’re in for a treat. Coffee ice cream is the perfect way to combine your love for caffeine and dessert, and with the Ninja Creami, making it at home has never been easier. This versatile machine allows you to create creamy, dreamy ice cream with endless customization options. Whether you’re craving a classic coffee flavor or something more adventurous like mocha or caramel macchiato, this guide has you covered.
Let’s continue into the world of Ninja Creami coffee ice cream recipes and discover how to make your own café-worthy treats at home.
Why Use the Ninja Creami for Coffee Ice Cream?
The Ninja Creami has revolutionized homemade ice cream, and it’s particularly well-suited for coffee-flavored creations. Here’s why:
- Perfect Texture: The Ninja Creami’s powerful blade and spinning mechanism ensure a smooth, creamy consistency every time—no icy chunks or grainy textures.
- Customization: You can tweak your coffee ice cream to suit your preferences, whether you want it light and fluffy or rich and dense.
- Healthier Options: With the Ninja Creami, you control the ingredients. Swap out heavy cream for coconut milk, use natural sweeteners, or even make a low-calorie version without sacrificing flavor.
- Ease of Use: Simply prepare your base, freeze it, and let the Ninja Creami do the rest. Cleanup is a breeze, too.
Coffee ice cream is a crowd-pleaser, and with the Ninja Creami, you can experiment with different coffee types, roasts, and add-ins to create a dessert that’s uniquely yours.
Essential Ingredients for Ninja Creami Coffee Ice Cream
Before you start churning out batches of coffee ice cream, it’s important to gather the right ingredients. Here’s a breakdown of what you’ll need:
Base Ingredients
- Coffee: The star of the show. Use freshly brewed espresso, cold brew, or instant coffee for convenience.
- Milk: Dairy or non-dairy options like almond, oat, or coconut milk work beautifully.
- Sweeteners: Granulated sugar, honey, maple syrup, or sugar substitutes like stevia.
- Cream: Heavy cream, half-and-half, or coconut cream for a dairy-free alternative.
Flavor Enhancers
- Vanilla Extract: Adds depth and balances the coffee’s bitterness.
- Cocoa Powder or Chocolate Chips: Perfect for mocha variations.
- Spices: Cinnamon, nutmeg, or cardamom can add a warm, aromatic twist.
Optional Add-Ins
- Crushed Cookies or Nuts: For added texture and flavor.
- Caramel or Chocolate Swirls: Elevate your ice cream with a decadent touch.
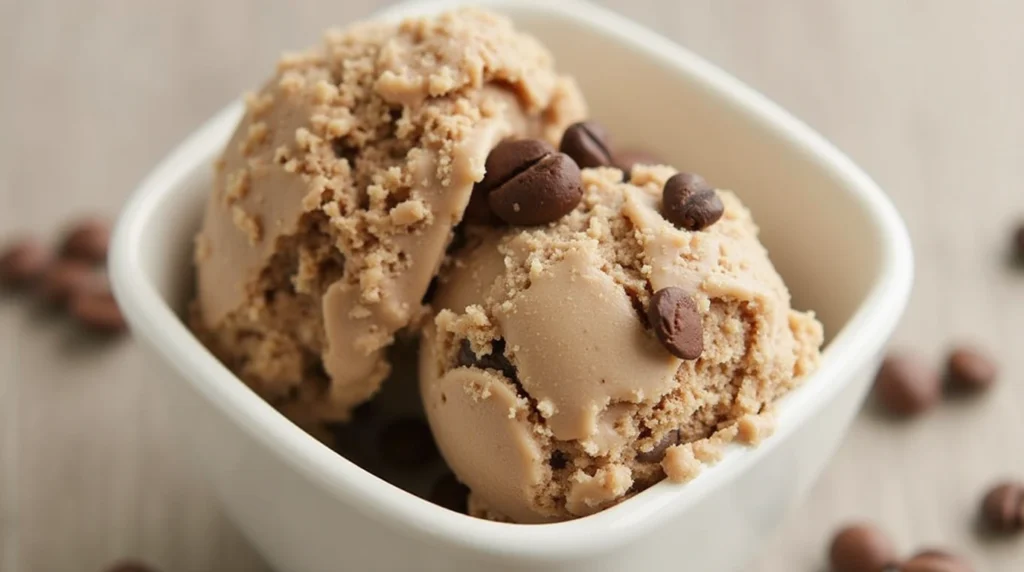
- Coffee Beans: For a crunchy, coffee-forward bite.
Basic Ninja Creami Coffee Ice Cream Recipe
Ready to make your first batch? This simple recipe is the perfect starting point for your Ninja Creami coffee ice cream journey.
Ingredients
- 1 cup strong brewed coffee (cooled)
- 1 cup whole milk (or your preferred milk alternative)
- 1/2 cup heavy cream (or coconut cream for a dairy-free option)
- 1/2 cup granulated sugar (adjust to taste)
- 1 teaspoon vanilla extract
Instructions
- Prepare the Base: In a mixing bowl, combine the cooled coffee, milk, heavy cream, sugar, and vanilla extract. Whisk until the sugar is fully dissolved.
- Pour into the Pint: Transfer the mixture into a Ninja Creami pint, leaving about an inch of space at the top to allow for expansion during freezing.
- Freeze: Place the pint in the freezer for 24 hours to ensure it’s fully set.
- Process: Remove the pint from the freezer and place it in the Ninja Creami. Select the “Ice Cream” setting and let the machine work its magic.
- Optional Add-Ins: If you’d like to incorporate mix-ins like chocolate chips or crushed cookies, use the “Mix-In” setting after the initial cycle.
- Serve and Enjoy: Scoop your homemade coffee ice cream into a bowl or cone and savor the rich, creamy flavor.
Tips for Success
- Chill Your Ingredients: Using cold coffee, milk, and cream helps the mixture freeze faster and results in a smoother texture.
- Adjust Sweetness: Taste your base mixture before freezing and adjust the sugar to your liking.
- Experiment with Coffee Strength: For a bolder flavor, use espresso or increase the amount of coffee in the recipe.
Variations of Ninja Creami Coffee Ice Cream
Once you’ve mastered the basic recipe, it’s time to get creative. Here are some delicious variations to try:
Mocha Coffee Ice Cream
For chocolate lovers, this mocha twist combines the richness of coffee with the indulgence of chocolate.
Ingredients:
- 1 cup strong brewed coffee (cooled)
- 1 cup whole milk
- 1/2 cup heavy cream
- 1/2 cup granulated sugar
- 2 tablespoons cocoa powder
- 1/2 cup chocolate chips (optional, for mix-ins)
Instructions:
- Follow the same steps as the basic recipe, but whisk the cocoa powder into the base mixture before freezing.
- After processing in the Ninja Creami, add chocolate chips during the “Mix-In” cycle for extra texture.
Caramel Macchiato Ice Cream
This recipe mimics the beloved Starbucks drink, blending coffee with sweet caramel swirls.
Ingredients:
- 1 cup strong brewed coffee (cooled)
- 1 cup whole milk
- 1/2 cup heavy cream
- 1/2 cup granulated sugar
- 1/4 cup caramel sauce (plus extra for swirling)
Instructions:
- Prepare the base mixture as usual, but add 1/4 cup of caramel sauce to the liquid ingredients.
- After processing in the Ninja Creami, drizzle additional caramel sauce into the ice cream during the “Mix-In” cycle.
Vegan Coffee Ice Cream
Dairy-free? No problem. This vegan version is just as creamy and delicious.
Ingredients:
- 1 cup strong brewed coffee (cooled)
- 1 cup coconut milk (full-fat for creaminess)
- 1/2 cup coconut cream
- 1/2 cup maple syrup or agave nectar
- 1 teaspoon vanilla extract
Instructions:
- Combine all ingredients in a mixing bowl and whisk until smooth.
- Freeze and process in the Ninja Creami as usual.
Spiced Coffee Ice Cream
Add a warm, aromatic twist to your coffee ice cream with spices.
Ingredients:
- 1 cup strong brewed coffee (cooled)
- 1 cup whole milk
- 1/2 cup heavy cream
- 1/2 cup granulated sugar
- 1 teaspoon cinnamon
- 1/4 teaspoon nutmeg
Instructions:
- Mix the spices into the base mixture before freezing.
- Process in the Ninja Creami and enjoy the cozy, spiced flavor.
Tips for Perfect Ninja Creami Coffee Ice Cream
To ensure your coffee ice cream turns out flawless every time, keep these tips in mind:
- Use High-Quality Coffee: The flavor of your ice cream depends on the coffee you use. Opt for freshly brewed espresso or a high-quality cold brew.
- Balance Sweetness and Bitterness: Taste your base mixture before freezing and adjust the sugar to balance the coffee’s natural bitterness.
- Prevent Icy Texture: Add a splash of alcohol (like coffee liqueur) or a stabilizer like guar gum to keep the ice cream smooth.
- Experiment with Roasts: Try different coffee roasts (light, medium, dark) to discover your favorite flavor profile.
- Store Properly: Keep your ice cream in an airtight container to prevent freezer burn and ice crystals.
Frequently Asked Questions (FAQs)
Can I use decaf coffee?
Absolutely! Decaf coffee works just as well for those who want to enjoy coffee ice cream without the caffeine.
How do I make the ice cream less icy?
Increase the fat content by using more cream or add a stabilizer like guar gum or xanthan gum to the base mixture.
Can I make this without a Ninja Creami?
While the Ninja Creami makes the process effortless, you can use a traditional ice cream maker or even hand-churn the mixture in the freezer, stirring every 30 minutes until it reaches the desired consistency.
How long does the ice cream last in the freezer?
Homemade Ninja Creami coffee ice cream can last up to 2 weeks if stored in an airtight container.
In Summary
Making coffee ice cream with the Ninja Creami is a fun, rewarding experience that allows you to create a dessert tailored to your tastes. Whether you stick to the classic recipe or experiment with mocha, caramel, or spiced variations, the possibilities are endless. With the tips and recipes in this guide, you’re well-equipped to whip up a batch of creamy, dreamy coffee ice cream that rivals any store-bought version.
So, grab your Ninja Creami, brew a strong cup of coffee, and start churning your way to dessert perfection. Don’t forget to share your creations and let us know which variation is your favorite!